How To: Update the HOSTS file in Windows 8
| The below does not apply to Windows 10 ... seems Microsoft has finally corrected the issue ... Before you can install a custom HOSTS file in Win8, you will need to make a change in Windows Defender ... otherwise Defender will automatically remove your custom file and replace it with the default from Microsoft.
"This issue occurs because Windows Defender may determine incorrectly that the Hosts file was changed by malware" Hostsman even has a warning about this issue ...
|

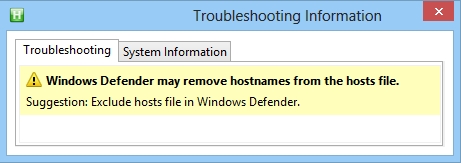
 | The folks at Microsoft that write the code detection for Defender are just lazy or don't get it! ... There has never been a malware infection that only affected the HOSTS file ... so why if when nothing else is detected does Defender still determine that you are infected? So in order to avoid the false detection, follow the instructions in the above Microsoft article. Basically you will need to exclude the Hosts file from scanning in Windows Defender. Once you have done this installing/updating should no longer be an issue. |
Next step
Simply locate the "hosts.zip" file you downloaded, by default it should be located in your "User" Download folder.
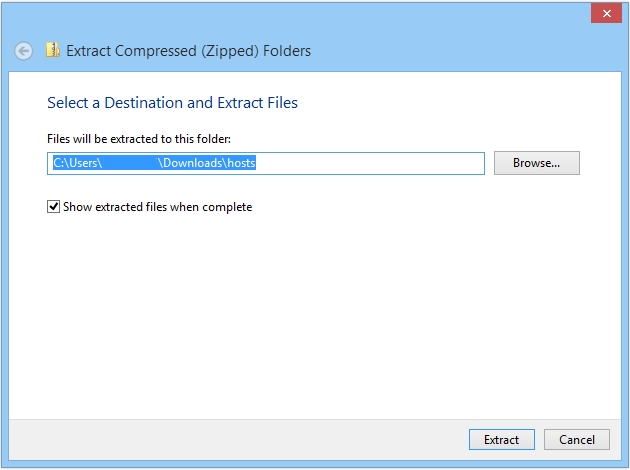
Highlight the file (single-click) then right-click and select > Extract All from the menu ...
Next: Make sure there is a check in the "Show extracted files when complete" option [screenshot]
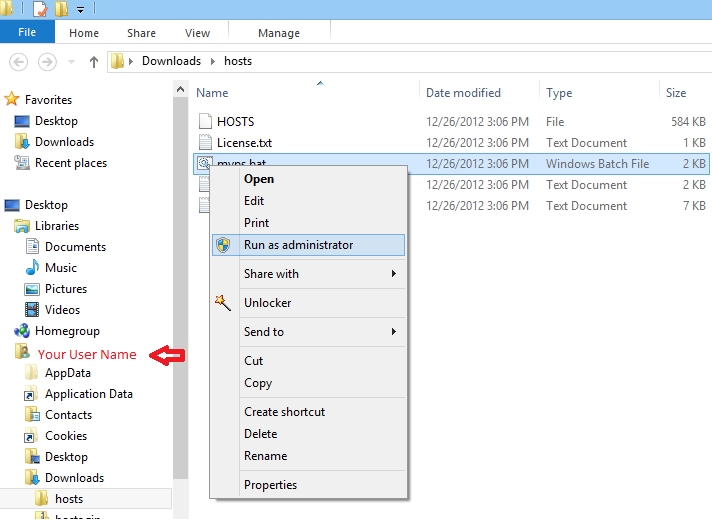
Next: right-click the installer (mvps.bat) and select: Run as Administrator (see below)
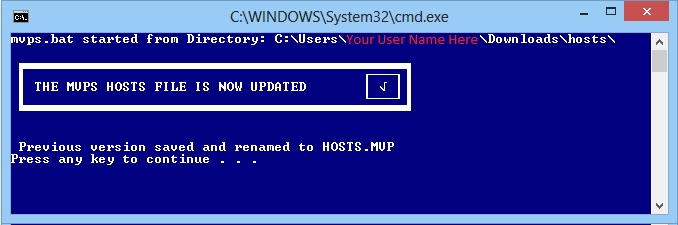
Ok the UAC prompt and the batch file will run ... which will backup the existing HOSTS file to HOSTS.MVP then copy the updated HOSTS file to the proper location. You should see a completed prompt (press any key) and that's it ...
If you were previously using the MVPS HOSTS and Windows 7 ... the process is exactly the same.
The below screenshot shows the "MVPS HOSTS FILE IS NOW UPDATED" message ...
Editors Note: in most cases a large HOSTS file (over 135 kb) tends to slow down the machine.
To resolve this issue (manually) open the "Services Editor"
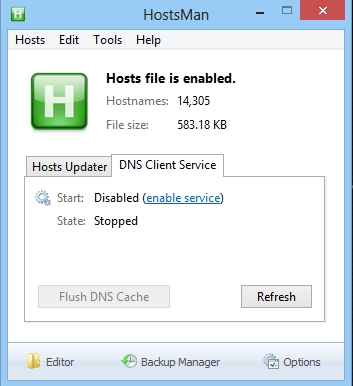
 Either Hostsman or Hosts File Editor includes the option to turn off the DNS Service [screenshot]
When set to Manual you can see that the above "Service" is not needed (after a little browsing - when set to Manual) by opening the Services Editor again, scroll down to DNS Client and check the "Status" column. It should be blank, if it was needed it would show "Started" in that column. There are several Utilities that can reset the DNS Client for you ... [more info]
Editors Note: The above instructions are intended for a single (home-user) PC. If your machine is part of a "Domain", check with your IT Dept. before applying this work-around. This especially applies to Laptop users who travel or bring their work machines home. Make sure to reset the Service (if needed) prior to connecting (reboot required) to your work Domain ...
Important! If you are using Network Discovery then the DNS Client service is required and should not be set to either Manual or Disabled.
 Workaround for using the MVPS HOSTS file and leaving the DNS Client service enabled (set to: Automatic)
- If you find after a period of time that your browser seems sluggish with the DNS Client service enabled you can manually flush the DNS cache
- Close all browser windows ... Win8 users - Charms Bar > Search > (type) command prompt > Select: Command Promt (left pane) Ok the UAC prompt
- (type) ipconfig /flushdns (press Enter) Then close the Command Prompt ...
A better Win8 workaround would be to add two Registry entries to control the amount of time the DNS cache is saved. (KB318803)
Editing the HOSTS file
In the event you need to edit the HOSTS file and are unable (system message) it may be due to the "permissions" preventing you from editing the file.
- Right click the Hosts file and select > Properties
- Click the Security tab
- Highlight your user account in the list
- Press the Edit button
- Select (place a check in) Full control
- Press OK in the various dialogue boxes to confirm the changes.
You can also Add "Take Ownership" to Context Menu (recommended)
SendTo Tip: if you add Notepad to your SendTo menu, then you can View/Edit the HOSTS file that way.
- Win8 users > Charms Bar > Search (type) run > Select: Run (left pane) (type) shell:sendto (press Ok)
- Right-click a blank space in the right pane and select: > New > Shortcut then click Browse and navigate to the Windows folder, highlight "notepad.exe"
- Name your shortcut: Notepad and Ok
- Right-click the Notepad shortcut and select: Properties > click Advanced and place a check in "Run as Administrator". click Ok and then Apply.
You cannot modify the Hosts file or the Lmhosts file in Windows Vista and Windows 7
The actual location of the HOSTS file is defined in the following Registry key:
HKEY_LOCAL_MACHINE\SYSTEM\CurrentControlSet\Services\Tcpip\Parameters\DataBasePath
Other strange quirks
I've seen the HOSTS file "Attributes" set to an value of N or I ... as much as I can find it stands for:
FILE_ATTRIBUTE_NOT_CONTENT_INDEXED
On Windows NTFS volumes, the attribute FILE_ATTRIBUTE_NOT_CONTENT_INDEXED can be set for directories and files, so that the directories and files are not indexed by the Windows Indexing Service.
This occurs when (one or more) of the Advanced File attributes are unchecked = File > Properties > Advanced button
Note: to view the "Attributes" you need to add that option in Windows Explorer ... right-click the Header bar and select: More > Attributes
Programs are unable to access the HOSTS file message
Windows may detect that the HOSTS file was updated and it assigns a new Security setting to the HOSTS file.
Right-click the HOSTS file and select: Properties ... if you see the following message (at the bottom)
"This file came from another computer and might be blocked to protect this computer"
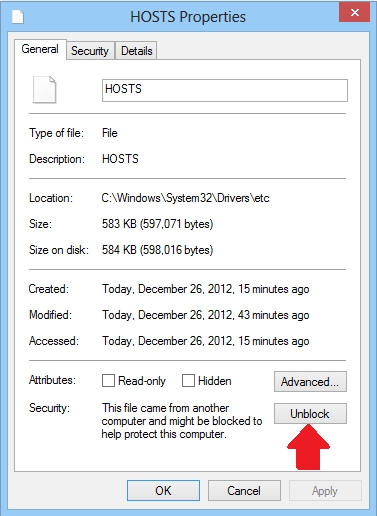
Click Unblock, click Apply, click the Security tab (up top) and take "Full Control" of the file (see above)
To view Hidden Files
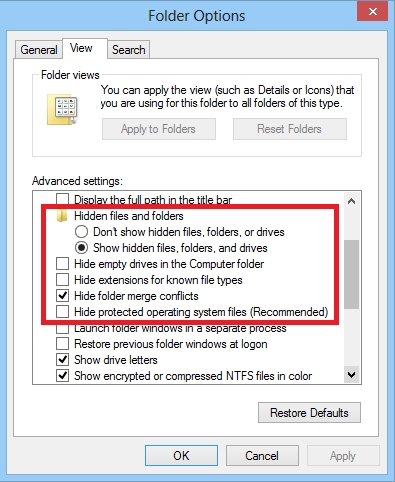
To allow yourself to view all file types, open File Explorer > View > Options > View tab
or Organize > Folder and search options > View tab [screenshot]
- Scroll down to the Hidden Files and Folders section
- Select: "Show hidden files and folders"
- Uncheck: "Hide file extensions for known file types"
- Uncheck: " Hide protected operating system files"
- Ok the Prompt, click Apply, Ok [screenshot]
Editors Note: general users should reverse the above when not in need as this exposes all system files, including several on the Desktop (desktop.ini) which you do not want to mess with ...
 Related Utilities
 | Hosts File Editor ... great little freeware program with all the features of Hostsman ... |
| HostsMan can Edit, Update and Enable/Disable the HOSTS file ... make sure to "Run as Administrator". Right-click the Hostsman shortcut and select: Properties ... click Advanced |